Atlassian Jira is software that helps to you in manage a project (https://www.atlassian.com/). You can capture and organize issues on the project, prioritize them, and take action on what's important, and stay up to date on what is happening with the WebRatio application.
WebRatio integrates with Atlassian Jira through an Eclipse plugin.
The plugin allows you to monitor, add, and update Jira issues while remaining in WebRatio.
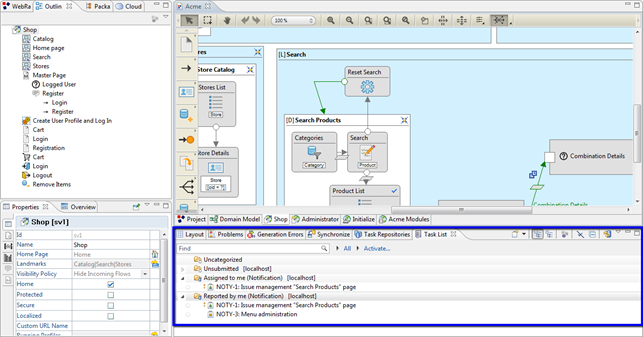
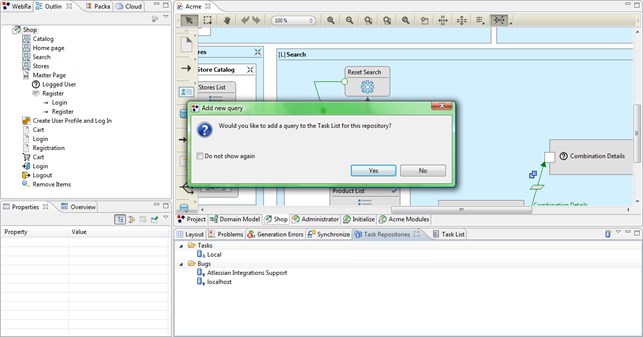
You can see a preview of the WebRatio interface with the Jira view in the following image:
Prerequisite:
In order to install the plugin you need to first download the Jira application because the plugin works using with the Jira service. To install and configure the Atlassian Jira eclipse plugin, follow these steps:
1. Go to https://www.atlassian.com/software/jira/try/?tab=download
2. In the page you can choose two ways to download:
a. In tab “you host”, the version can be downloaded as a free trial version, with no requirements.
b. In tab “we host”, the version can be downloaded only if you submit a credit card number, even for the trial period.
3. At the end of the installation you must register on the Atlassian’s application (http://localhost:8080). The username and password you choose will be used later in the installation of the plugin in WebRatio.
4. Configure the system so that WebRatio can connect to the application: Administration -> System -> Edit Settings, set Accept remote API calls->ON and update the changes.
Here is the procedure to install the Atlassian Jira plugin in WebRatio:
-
Choose Help → Install New Software.
-
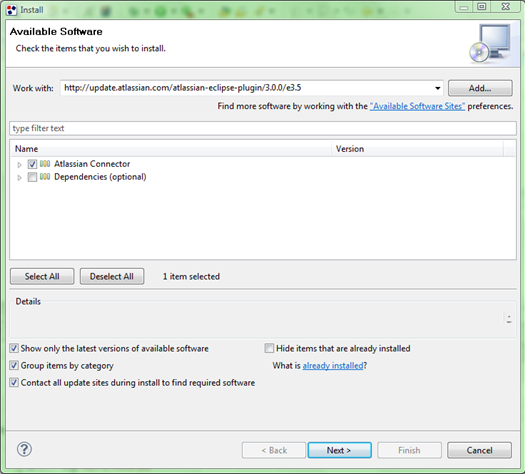
Set "http://update.atlassian.com/atlassian-eclipse-plugin/3.0.0/e3.5" as repository location in the field “Work with”.
-
Choose the “Atlassain Connector” package to install.
-
Click the “Next” button to install it.
Show the “Task Repositories” view, Window → Show View → Other → Tasks → Task Repositories.
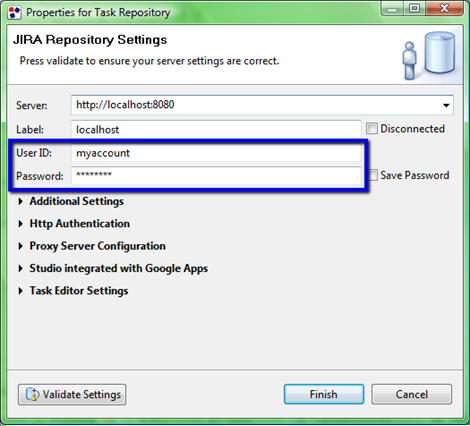
In the view, create a task repository and perform task manager: right-click in the just-opened view and select “Add Task Repository”. Choose Jira in the first dialog window, then configure the settings of the repository server.
Insert:
-
“Server” -> "http://localhost:8080"
-
“Label” a name that you want give it
-
“User ID” and “Password” fields are the Jira account that you chose in the Jira registration phase
After you have inserted the above data, click the “Finish” button.
When you click the “Finish” button, you will be asked “Would you like to add a query to the Task List for this repository?”
A query is a folder that contains all of the issues that you want to register. A query differs depending on the type of issue that you want to insert:
-
Assigned to me
-
Reported by me
-
Added recently
-
Updated recently
-
Resolved recently
To add a query, right-click on your Task Repository and select “New Query”. You can choose three ways to create a query:
A query is a folder that contains all of the issues that you want to register. A query differs depending on the type of issue that you want to insert:
-
Assigned to me
-
Reported by me
-
Added recently
-
Updated recently
-
Resolved recently
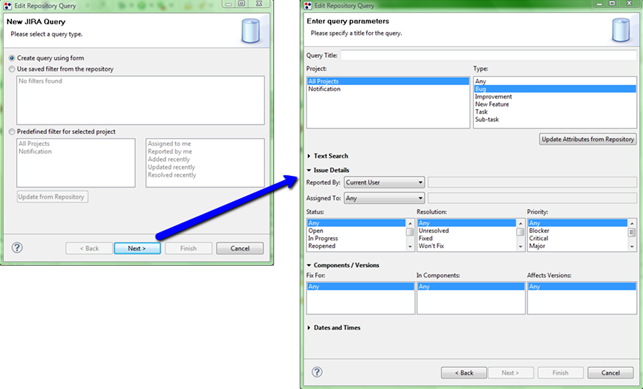
To add a query, right-click on your Task Repository and select “New Query”. You can choose three ways to create a query:
-
“Create query using form” where you can choose:
-
The “Query title”
-
The type of query
-
The “Issue Details”
-
The “Components/Versions”
After you have inserted the data, click the “Finish” button. In the “Task List” view (Window → Show View → Tasks →Task list) appears:

-
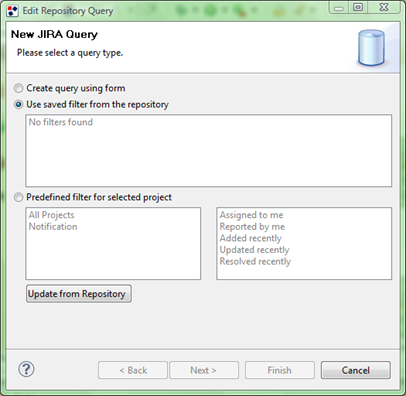
“Use saved filter from the repository” if you have previously saved a filter.
-
With the “Predefined filter for selected project” option you can choose or “All Projects” or the project that you just created on the Jira website and one with a query type (e.g., Test -> Assigned to me).
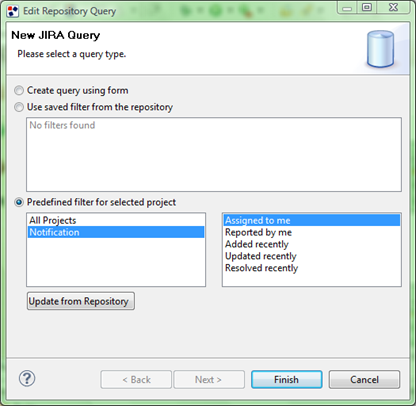
When you choose this option and click on “Finish” button, the associated task will be loaded automatically into the query. The “Task List” view appears:

Once the repository is added, a query must be created in order to access the tasks stored in the repository. The tasks of the query are the issues that will be shown in the Task List view.
Now you can add the task that you registered as the issue in the query: Right-click on Query -> Add -> “New Task” or right-click on Task Repository -> New Task.
The following screen will appear:
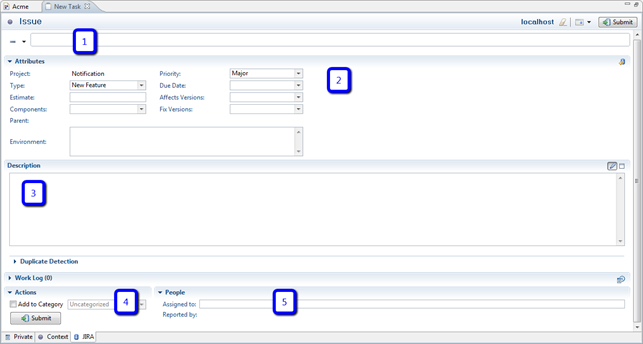
In the main window above, all the information about that task can be inserted, including:
-
Name of task
-
Attributes, where you set the features such as:
-
“Priority”
-
“Type” of task
-
“Estimate”
-
“Due date”
-
“Estimate”
-
“Affects Versions”
-
“Components”
-
“Fix Version”
-
“Environment”
-
The descriptions of the problem that you want to insert
-
Adding to specific category
-
People who are involved: “Assigned to” and “Reported by”
Once all the data has been provided, the new issue can be submitted in the repository by clicking the “Submit” button.
In the same way, you can modify tasks by double-clicking on the task. In addition to modifying the data described above, you can add attachments and comments relating to the task.
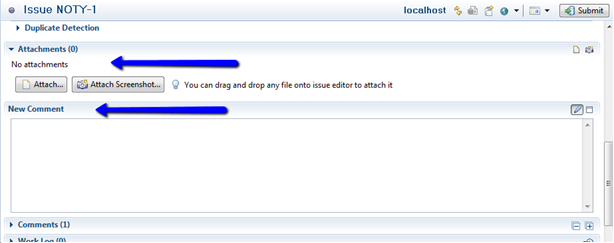
To store the changes in the repository, you must click the “Submit” button.
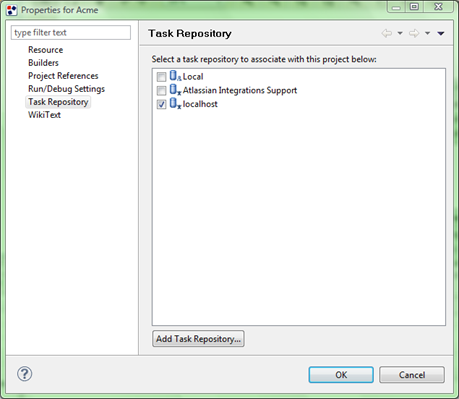
You can associate a project with a Task Repository by opening the properties of a project from the project explorer:
-
Right-click on project -> Properties -> Task Repository.
-
Click on tab “Task Repository”
-
Choose the repository that you want to associate to the project
-
Click the “OK” button