Introduction
This article is a step by step tutorial to guide you in the management of Signing Identities and Certificates.
You need to read, understand and accomplish each step reported to be able to build iOS application in debug and release mode.
Prerequisites
The procedure shown in the article requires you to have:
- an active internet connection to request, generate and download Signing Identities and Certificates
- a Mac computer to generate the Certificate and export it to your drive
- a developer account for the Apple Store.
To register please follow these steps:
- Choose the Developer Program for you here
- Enroll using your Apple ID or create a new one
- Register as a developer
- Read the Developer Distribution Agreement
- Pay the 99$ USD yearly registration fee
- Verify the account
- each of the following chapters starts from the iPhone Developer Connection Portal page.
App ID
Let’s see how to create a new App ID.
The App ID iidentifies one or more apps developed by a single development team. The string is the concatenation of the Team ID (automatically generated by Apple and is unique to a specific development team), while you have to provide the Bundle ID. This can match either the Bundle ID of a single app or a set of Bundle IDs for a group of your apps.
An example of App ID can be: ABCDE12345.com.webratio.helloworld. Where ABCDE12345 is the Team ID and com.webratio.helloworld is the Bundle ID.
You will need it to build an iOS Application in debug and release mode.
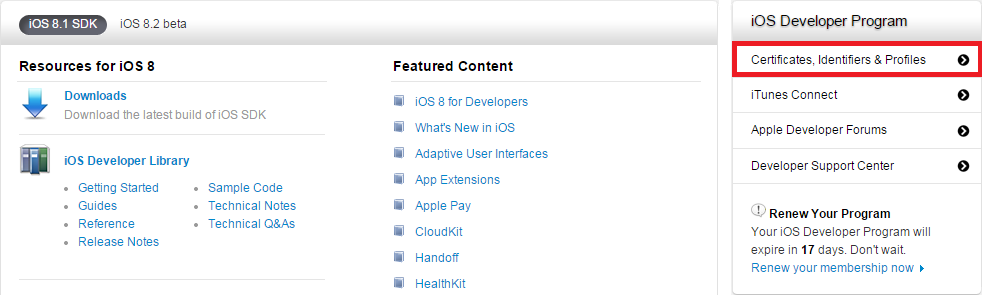
- Open the Certificates, Identifiers & Providers section
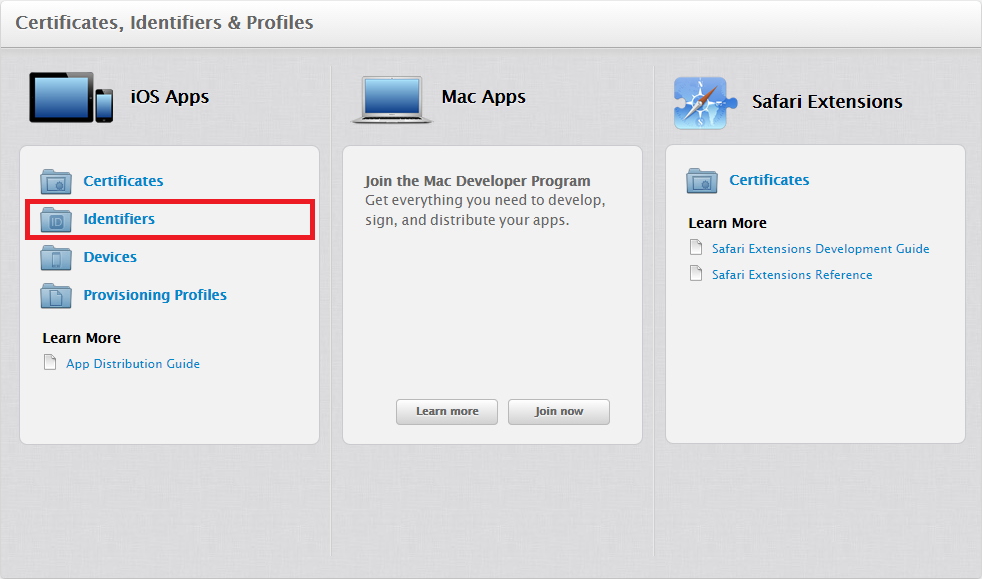
- You will see a dashboard from which you can open the Identifiers section
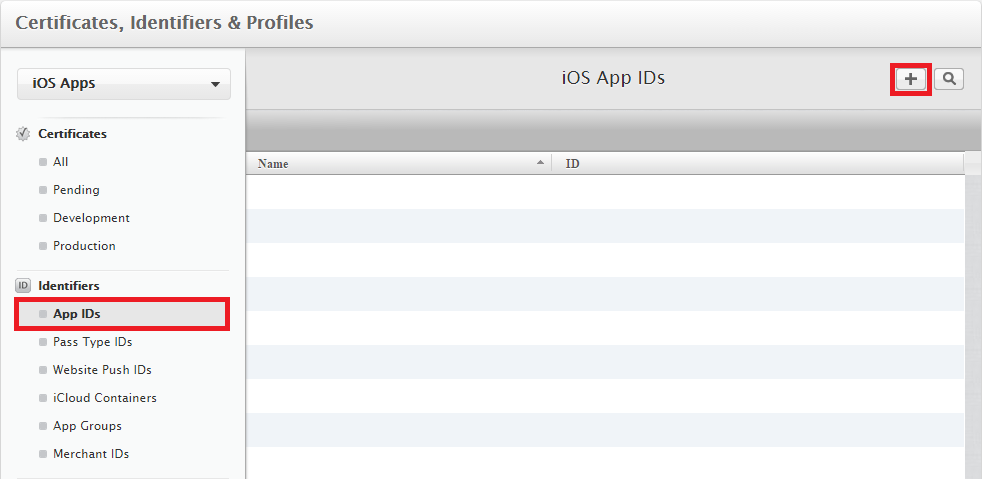
- To create a new App ID open the related section and click on the New button
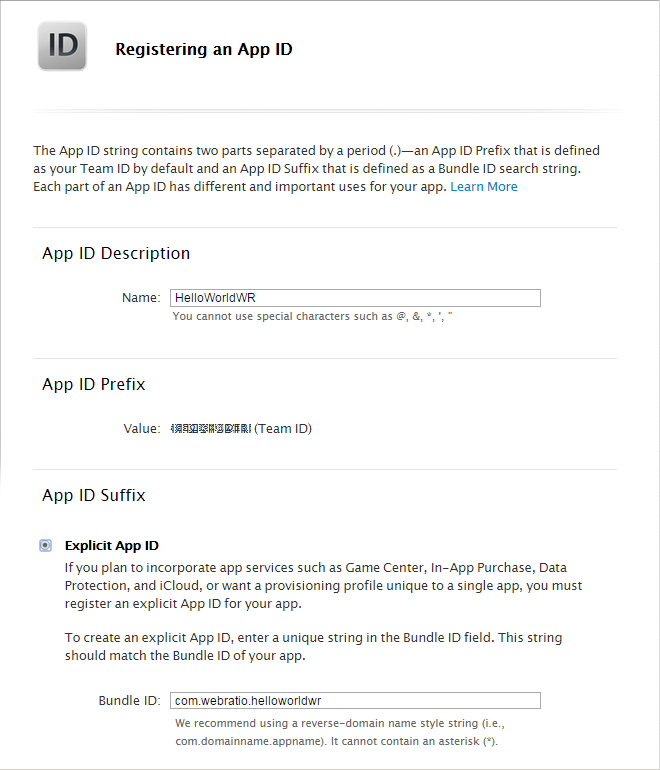
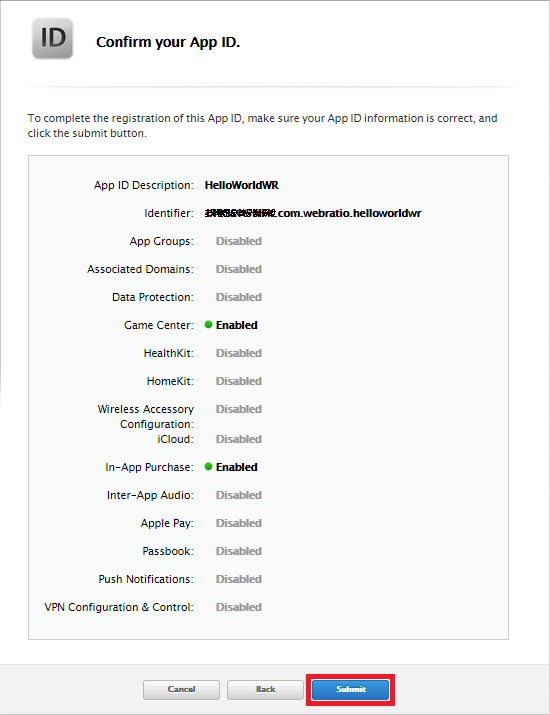
- Enter as Description detail the App Name, then choose an App ID Prefix and enter a valid Bundle Identifier. For instance this tutorial application is called HelloWorldWR so our iOS Bundle Identifier looks like com.webratio.helloworldwr. Once done, click Continue.
- Review the details and press on Submit and then on Done to create it
App Certificate
Certificates are used to sign apps and verify the developer identity. As a prerequisite for generating a Certificate you need to have an App ID.
At the end of the process you will have the Certificate that you need to create debug and release builds.
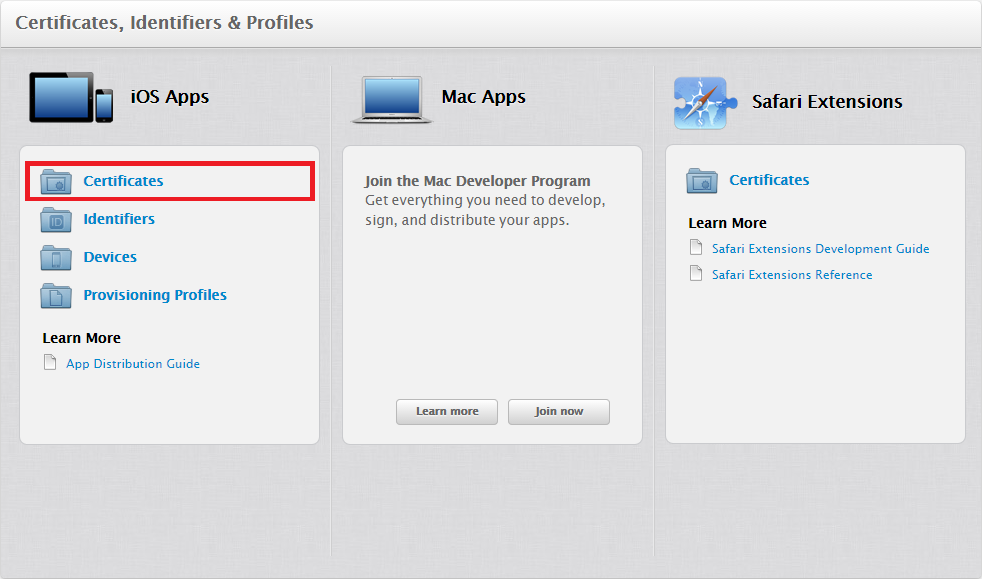
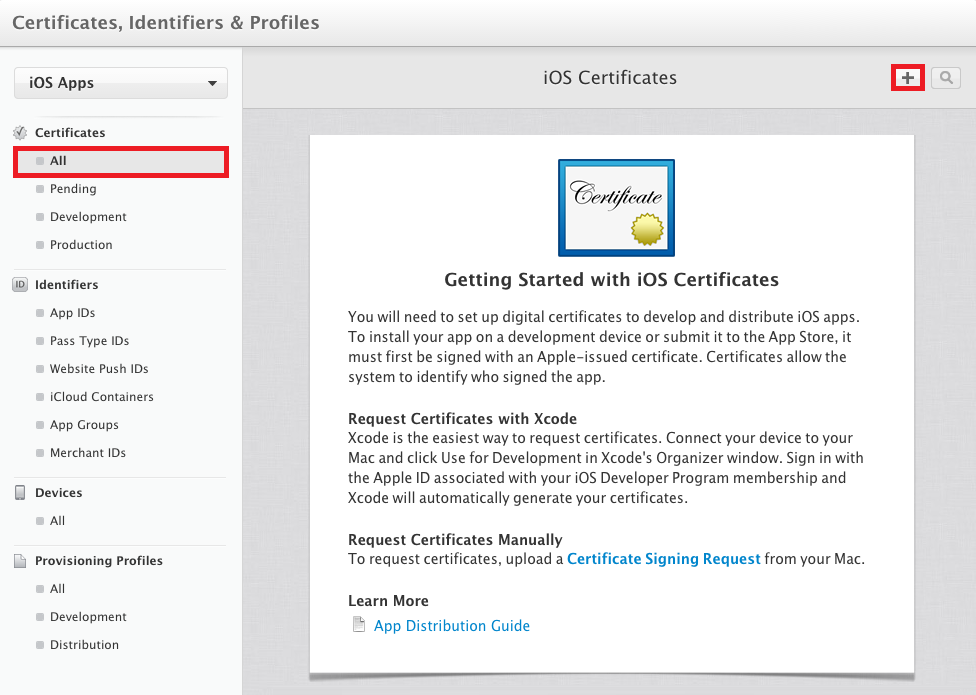
- From the main dashboard open the Certificates section
- To create a new Certificate open the related section and click on the New button
- Choose the type of certificate you need and then press Continue. In this tutorial the choice is iOS App Development.

- The next step shows the instruction to correctly create and generate the certificate in your Mac. Read carefully and press Continue. The next page will ask to upload a CSR file. If you already have one skip to step 7, otherwise proceed from next step.
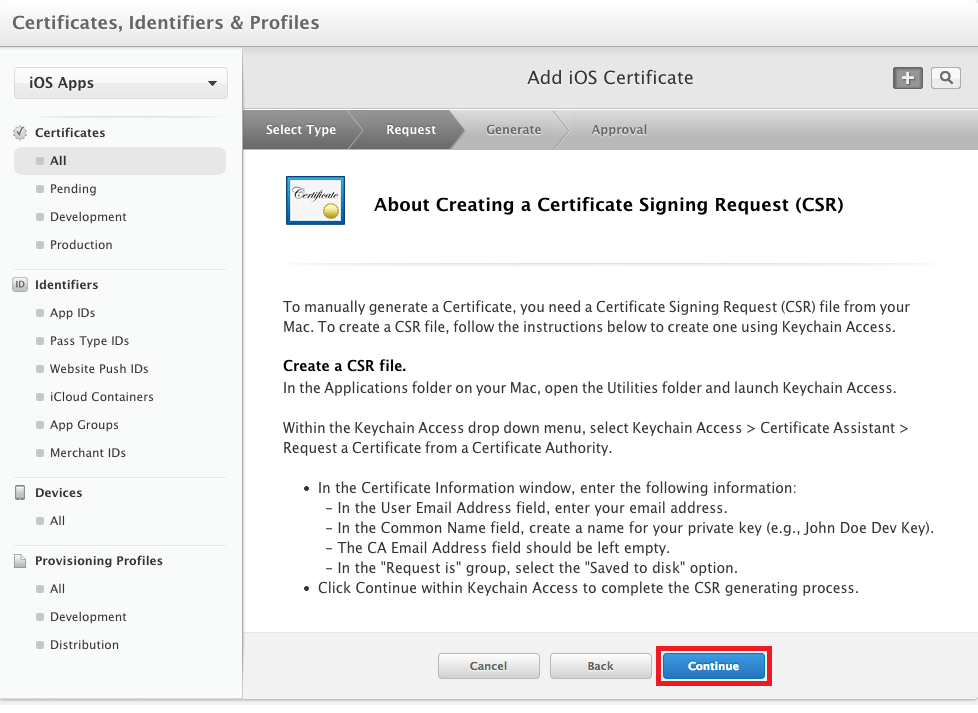
- Launch Keychain Access on your Mac an within the Keychain Access drop down menu, select Keychain Access > Certificate Assistant > Request a Certificate from a Certificate Authority
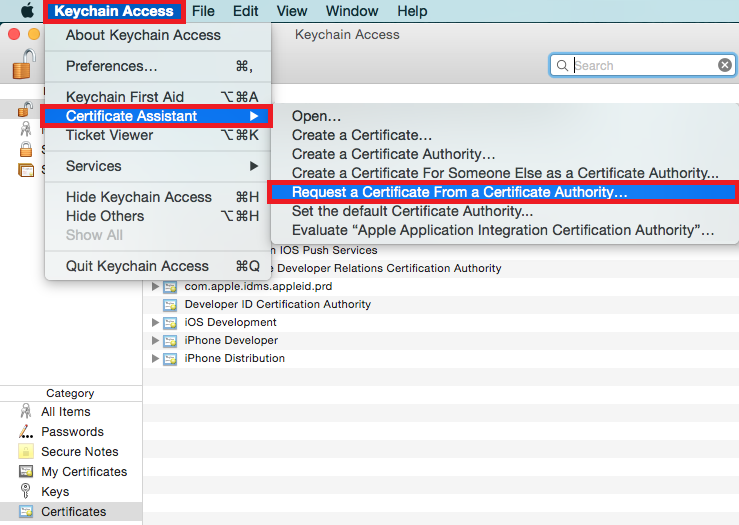
- A dialog appears asking for the certificate information; write your Email Address, add a Common Name (the name for this private key) and leave the CA Email field empty. Choose the option Saved to disk as the certificate will be stored in your local drive. Then press Continue to proceed.

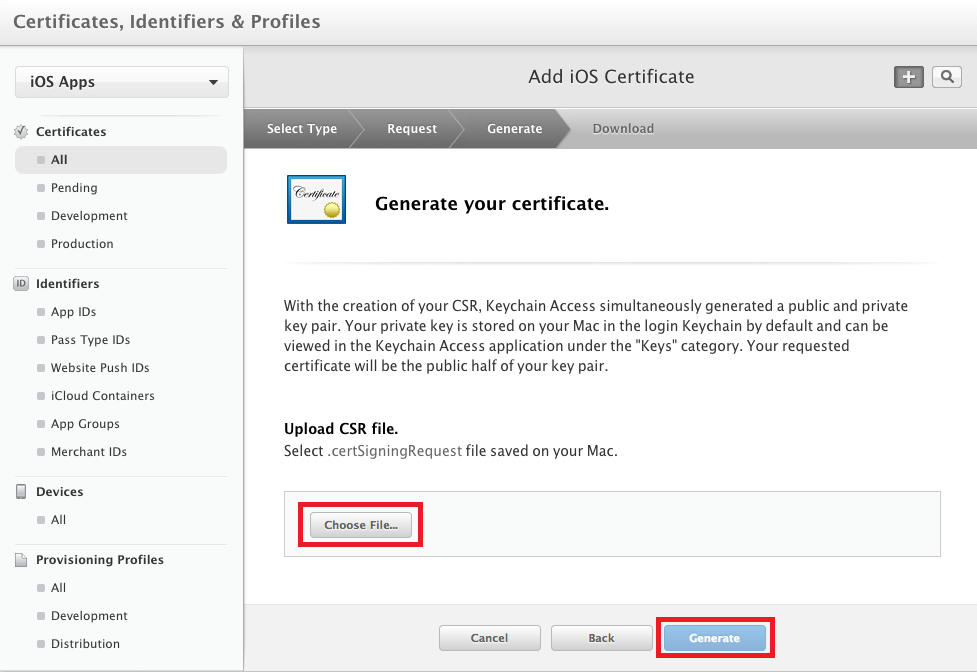
- Once you have the certificate on your drive go back to the browser and Upload the CSR file using the Choose File... option. After loading the certificate press on generate to obtain it.
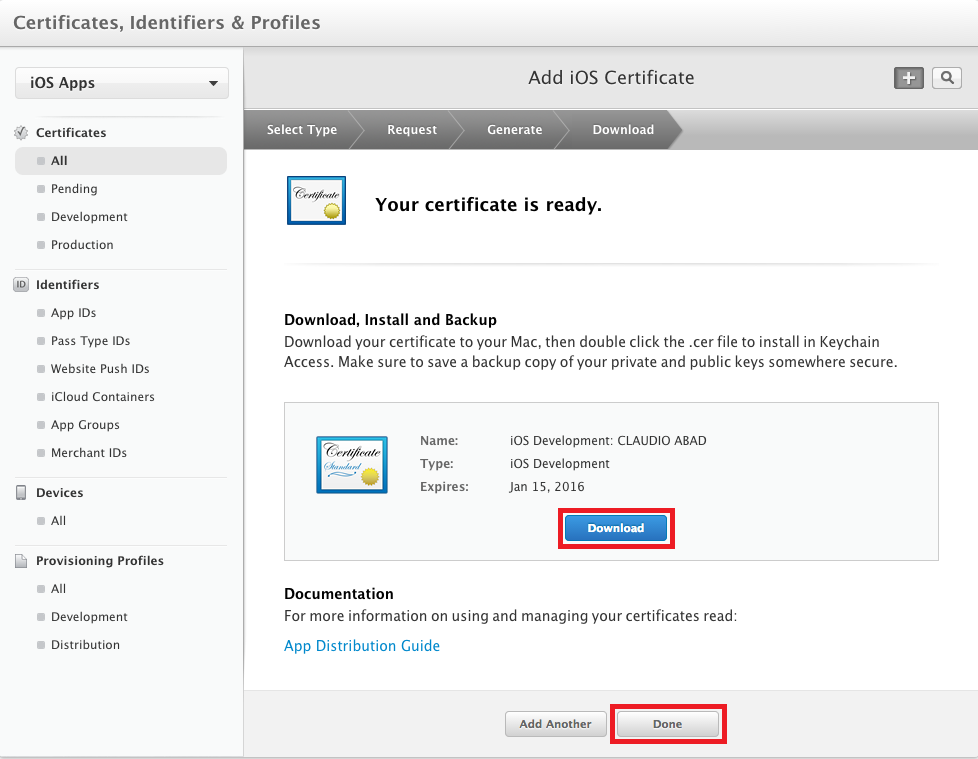
- The certificate is now ready to be downloaded. Just press the Download button and then Done to end the procedure.
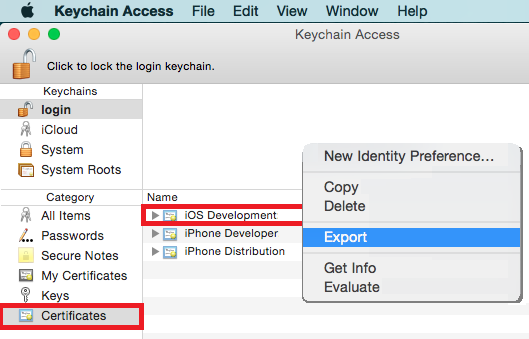
- Once the download is completed double-click on the *.cer file to install it in Keychain Access. You will now find it in Keychain Access in the list of available Certificates.

- Right-click on the brand new certificate and choose the option Export.
- A new dialog opens asking for where to export the file. Set a Save As name for it and choose the location using the Where field. Be careful to choose as File Format Personal Information Exchange (.p12). Then press Save. As soon as you press Save another dialog asks for a protection password. Type the desired password in the Password field and verify it just below in the Verify field. Then press OK to confirm.

iOS Provisioning Profile
A provisioning profile is used to match developers and devices to an iOS Development Team, and moreover enables a device to be used for testing. Getting the iOS Provisioning Profile requires you to have the iPhone Development Certificates, Unique Device Identifiers and an App ID.
You will need it to create debug and release builds and to distribute your mobile app.
Let’s see how to have it.
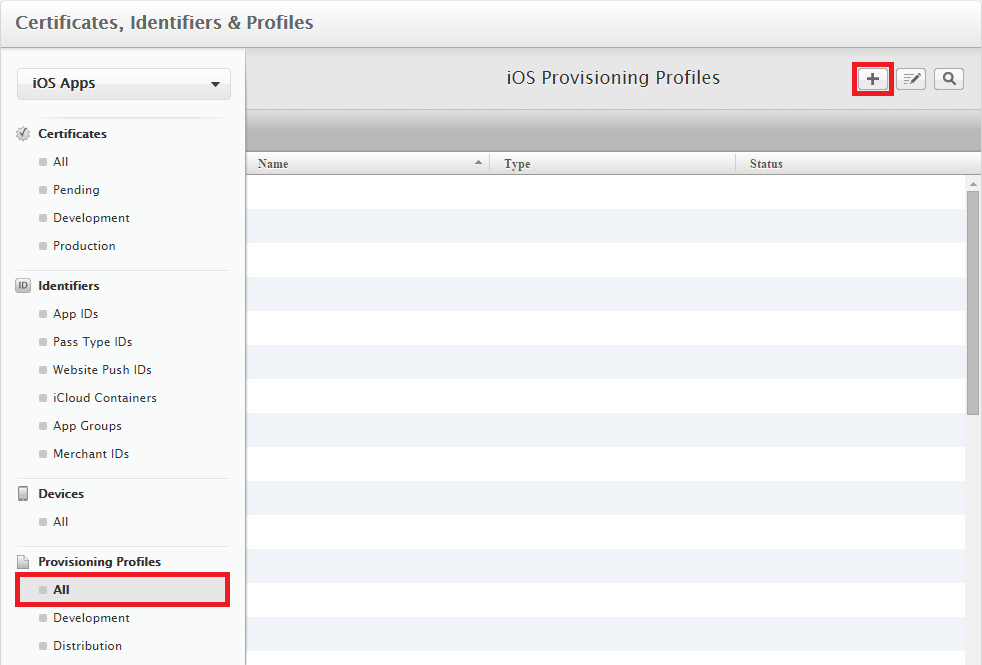
- From the main dashboard open the Provisioning Profiles section

- To create a new Provisioning Profile open the related section and click on the New button
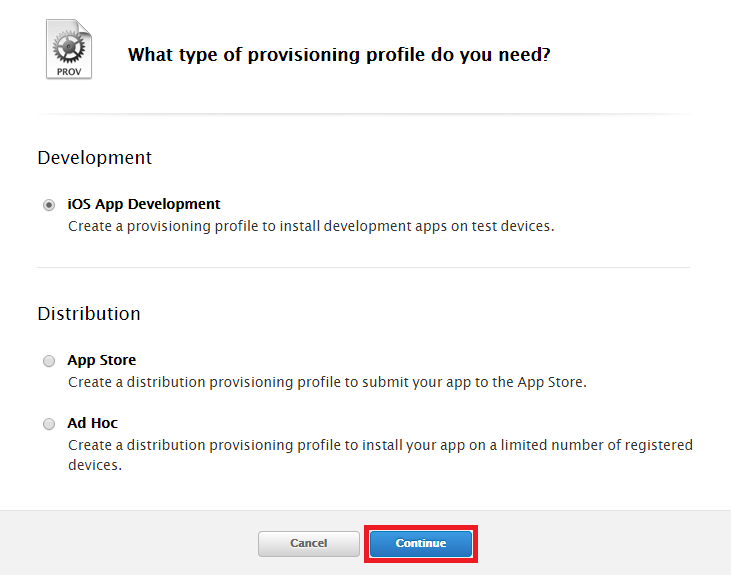
- Make your choice according to your needs (iOS App Development or App Store) and press on Continue
- Now you have to choose the App ID you want to install on devices or submit to the store. Choose the one from the dropdown and press on Continue

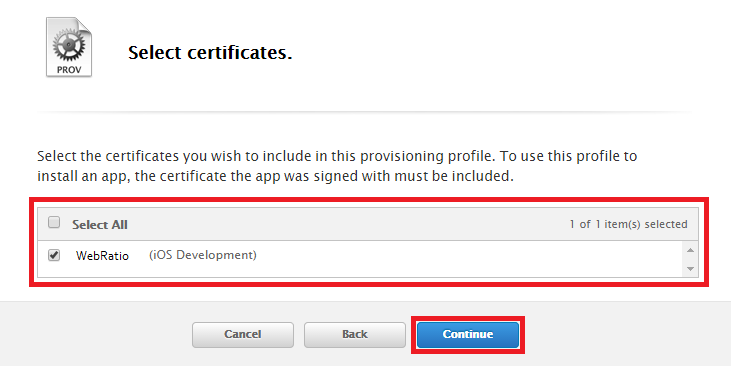
- Now you are asked to select the certificates you want to include in the provisioning profile. Pick the ones with a check and press on Continue
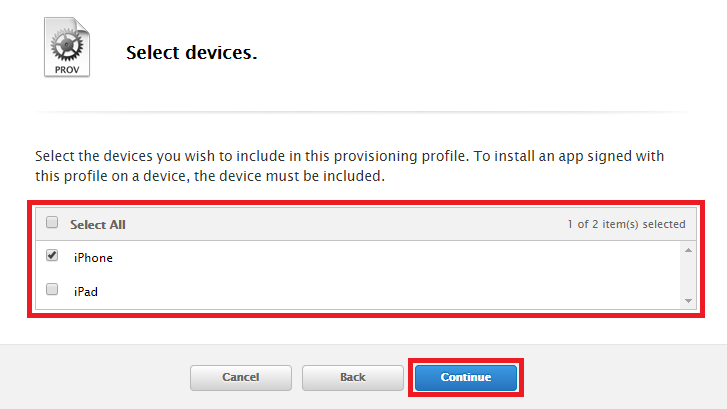
- Select the devices to which you want to install the app and press on Continue
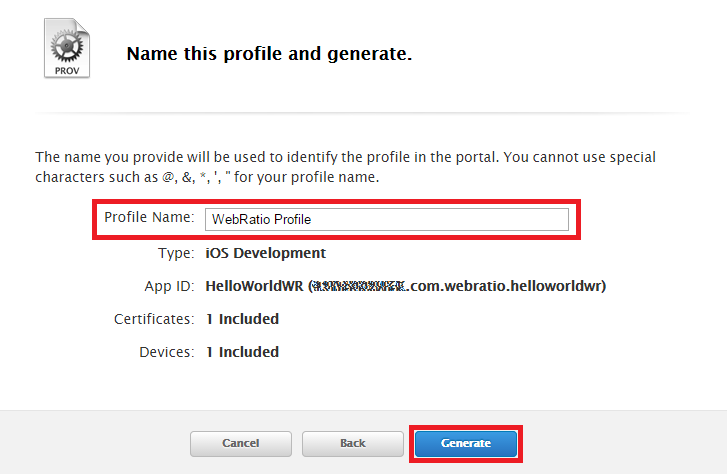
- Give a name to the Profile and Generate it
- Download the Provisioning Profile to your drive
App Groups
App Groups are used to create bundles to share common information across different mobile applications. An example may be the share of Keychain Credentials.
At the end of the process you will have the App Group Id.
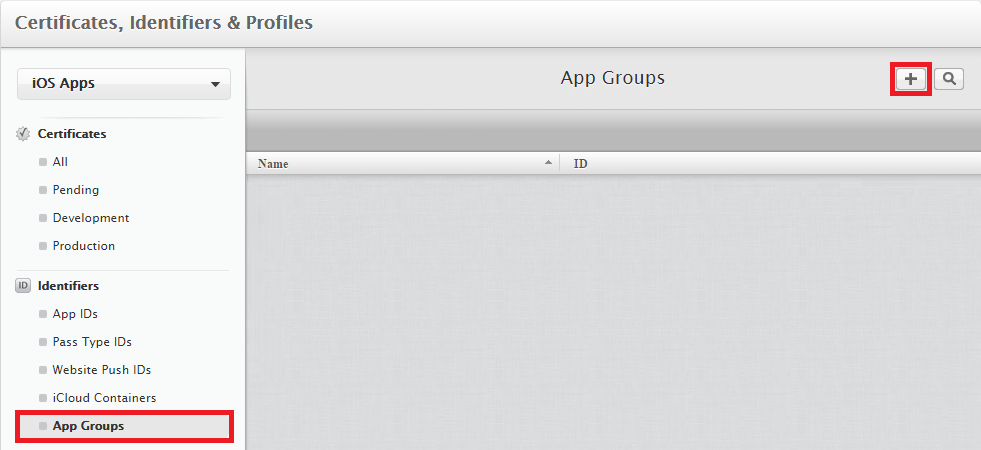
- From the main dashboard open the Certificates section
- To create a new App Group open the related section and click on the New button
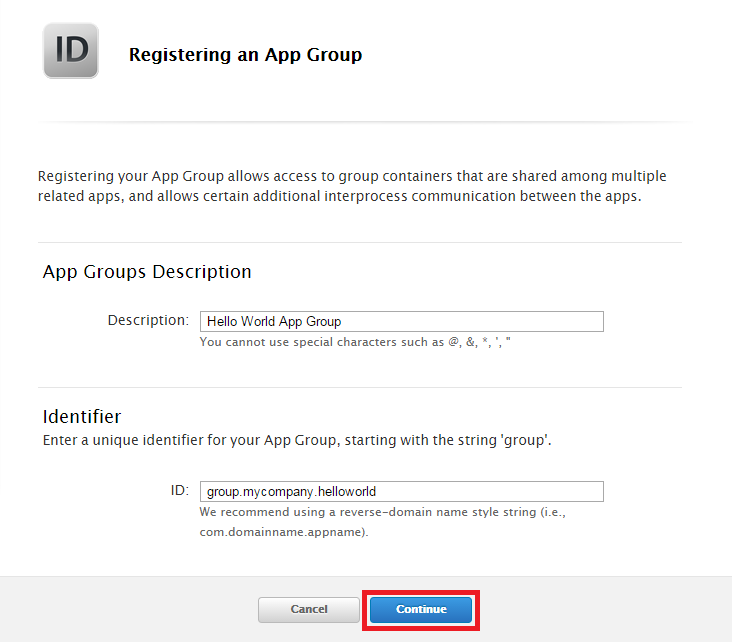
- Type a description and provide the group identifier. Then press on Continue to proceed.
- The next screen asks you for a confirm before registering your App Group. Press on Register to proceed.
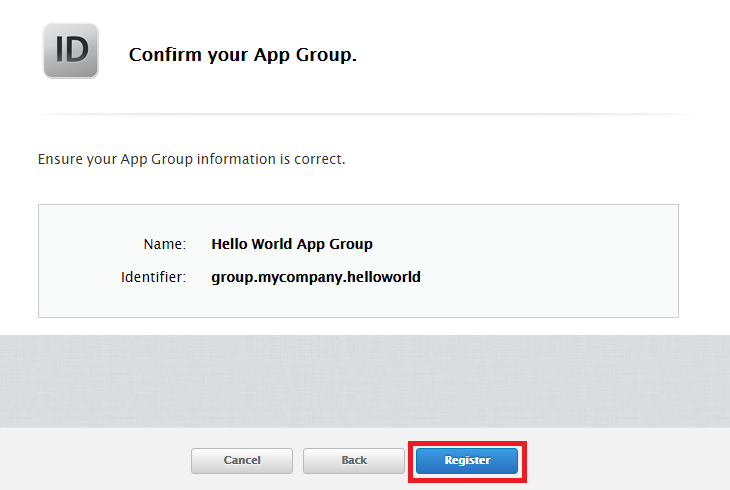
Take note of the Group Identifier and use it when needed.