Introduction
WebRatio Mobile Platform allows you to send push notifications from a Data Service project. To enable a project for push notifications, you need to add and configure a notification provider. The notification provider requires a specific configuration for each platform. For the iOS platform, you need to have an APNS Certificate and its related APNS Certificate Passphrase.

This article is a step-by-step tutorial on how to obtain an Apple Push Notification Service (APNs) Certificate to be used for sending push notifications to a mobile application.
What you need to set everything up and running is:
- An App ID for the Mobile App: it enables the Mobile App to receive push notifications.
- An APNs Certificate and its Passphrase for the Server: it enables your server to send push notifications through the APNs Server only for a particular mobile App, identified by the App ID.
- The Provisioning Profile for the Mobile App.
All this information is strictly related to the environment (development or production) you are setting up for the mobile application. This article explains the procedure to get a certificate for a development-environment setup. Of course, you can apply the same procedure for the production environment.
Notes
- The Certificate generated for development environments cannot be used for product environments. This means that it’s necessary to generate another certificate at the time you want to deploy the backend for sending push notifications.
- This procedure assumes that there were no certificates requested previously either for the Mobile App or the Server. If any exist, they need to be regenerated at the end of this procedure. Please refer to the How to build an iOS app articles.
Prerequisites
The procedure shown here requires you to have:
- An active Internet connection to request, generate and download Signing Identities and Certificates
- A Mac computer to generate the Certificate and export it to your hard drive
- A Developer Account to be used on the Apple Store. To create a Developer Account please follow these steps:
- Choose the Developer Program you will use here
- Enroll using your Apple ID or create a new one
- Register as a developer
- Read the Developer Distribution Agreement
- Pay the USD $99 yearly registration fee
- Verify the account
How to generate an App ID
You need an App ID to enable your Mobile Application to receive Push Notifications from an APNs Server.
Learn how to create an App ID by reading this guide (remember to connect to the iPhone Developer Connection Portal page).
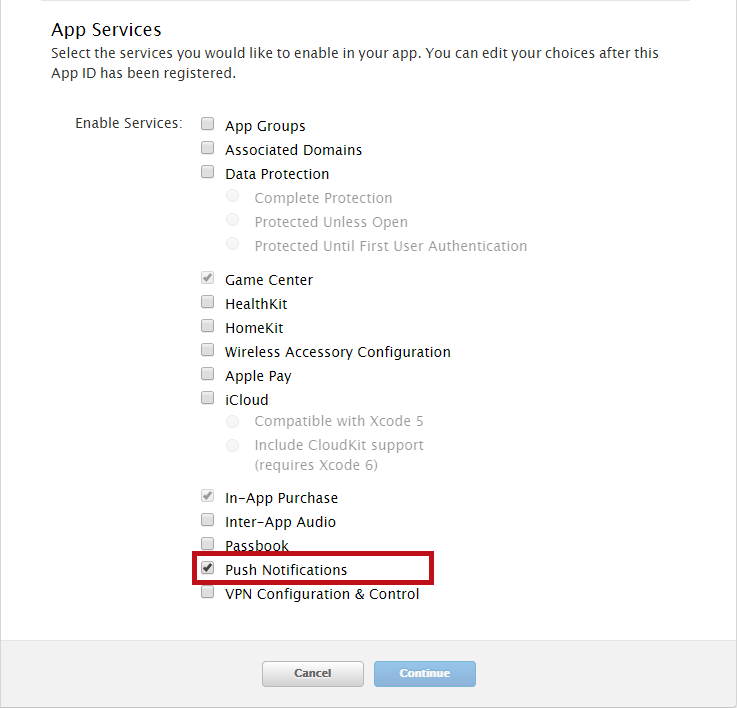
When arriving at step 4, choose the “Push Notifications” service option for the Mobile Application, as shown in the image below.
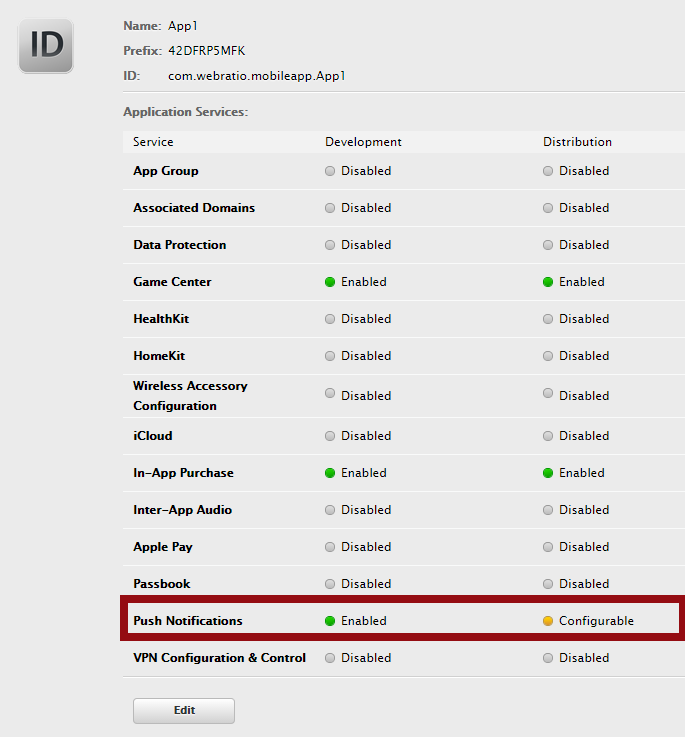
At step 5, the screen must show a green circle and the Configurable label close to the Push Notification property, as shown below in the image.

The value is set to Configurable to receive the Push Notifications we need to request and to generate an APNs Certificate.
How to generate the APNs Certificate
Let’s now generate the APNs Certificate related to your Mobile Application (the one for which you created the App ID). This certificate can be then used by your backend to send push notifications to the mobile application.
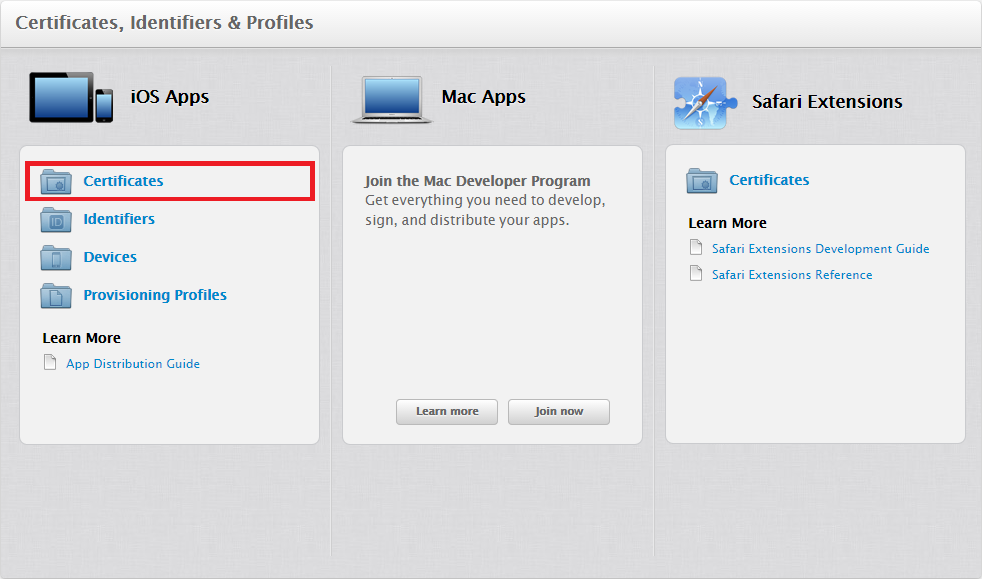
- From the main dashboard, open the Certificates section
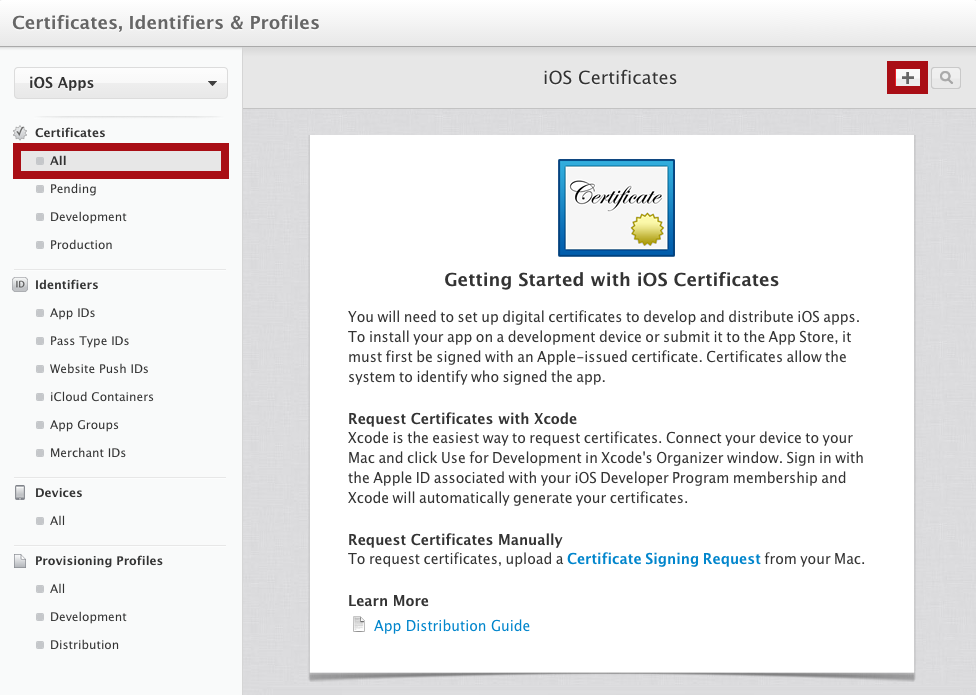
- To create a new Certificate, open the related section (clicking on All) and press the New button (identified by the plus sign).
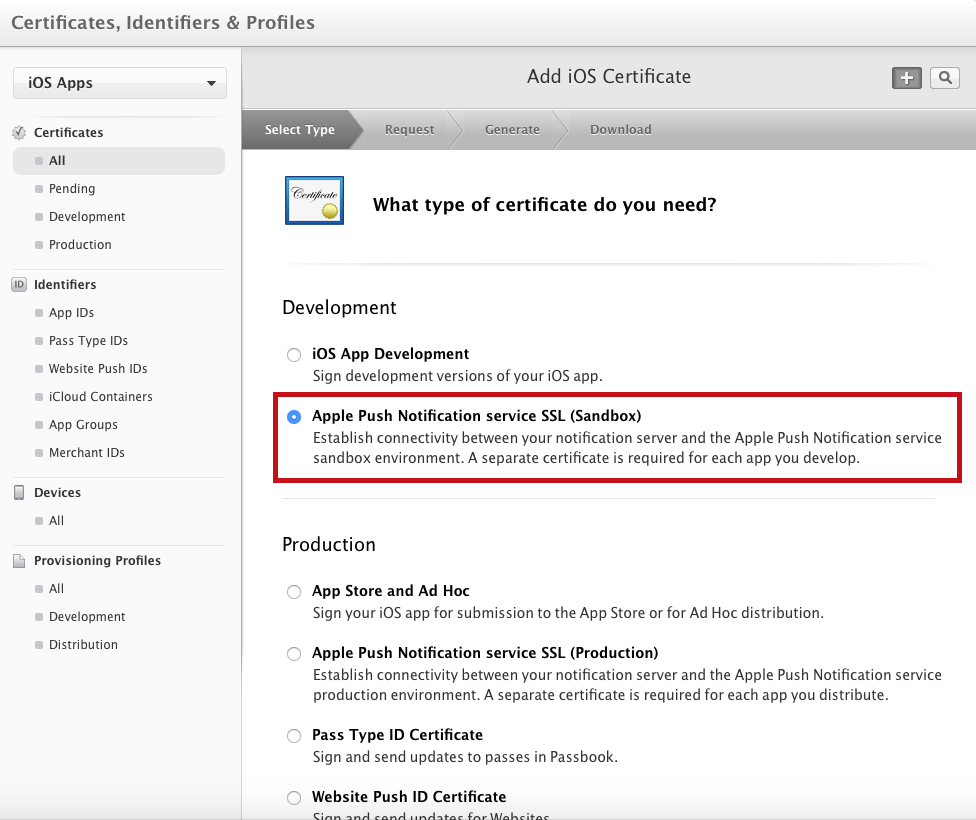
- Choose “Apple Push Notification service SSL (Sandbox)” for the certificate type.
- The next step asks for the App ID able to receive Push Notifications. Select the App ID corresponding to the desired mobile app (the one created previously) and press Continue.
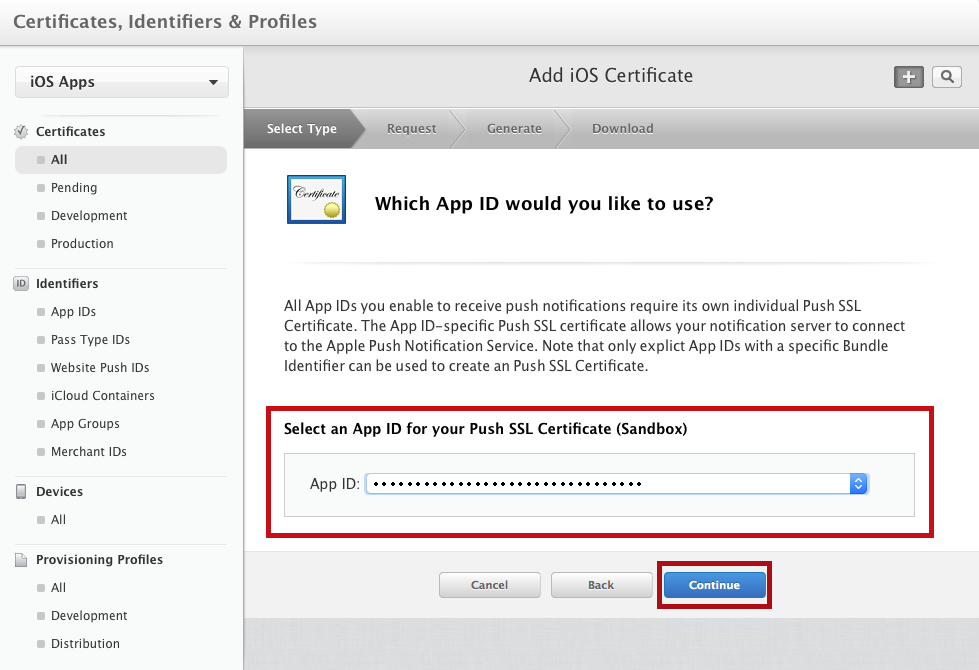
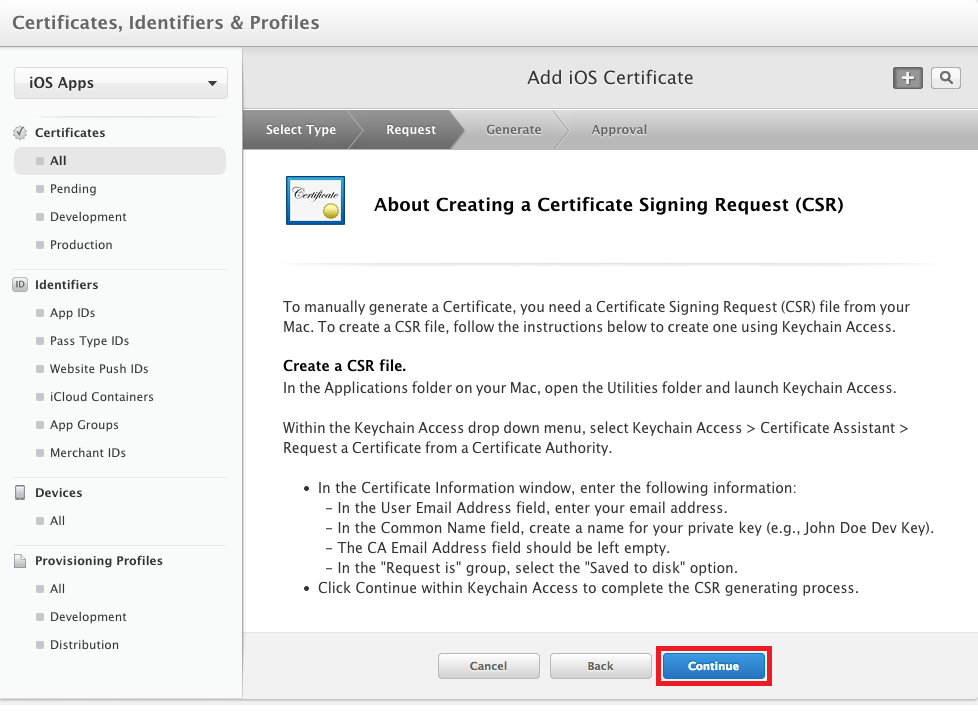
- The next step shows how to correctly create and generate the certificate on your Mac. Read carefully and press Continue. The next page will ask you to upload a CSR file. If you already have one skip to step 7; otherwise continue to the next step.
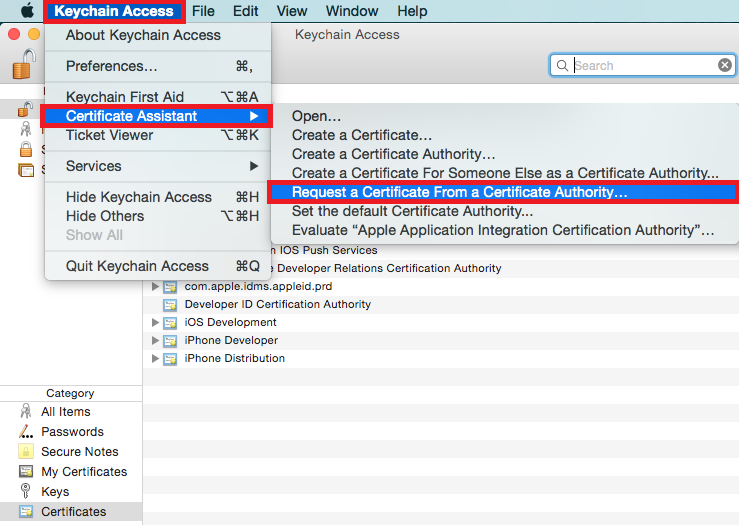
- Launch Keychain Access on your Mac and, within the Keychain Access drop down menu, select Keychain Access > Certificate Assistant > Request a Certificate from a Certificate Authority. Hereinafter Certificate Assistant becomes CA and Certificate (signing request) becomes CSR.
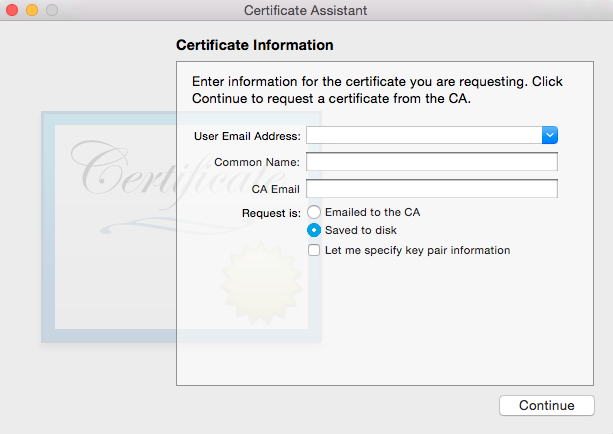
- A dialog appears asking for the certificate information; write your Email Address, add a Common Name (the name for this private key) and leave the CA Email field empty. Choose the option Saved to disk as the certificate will be stored in your local drive. Then press Continue to proceed.
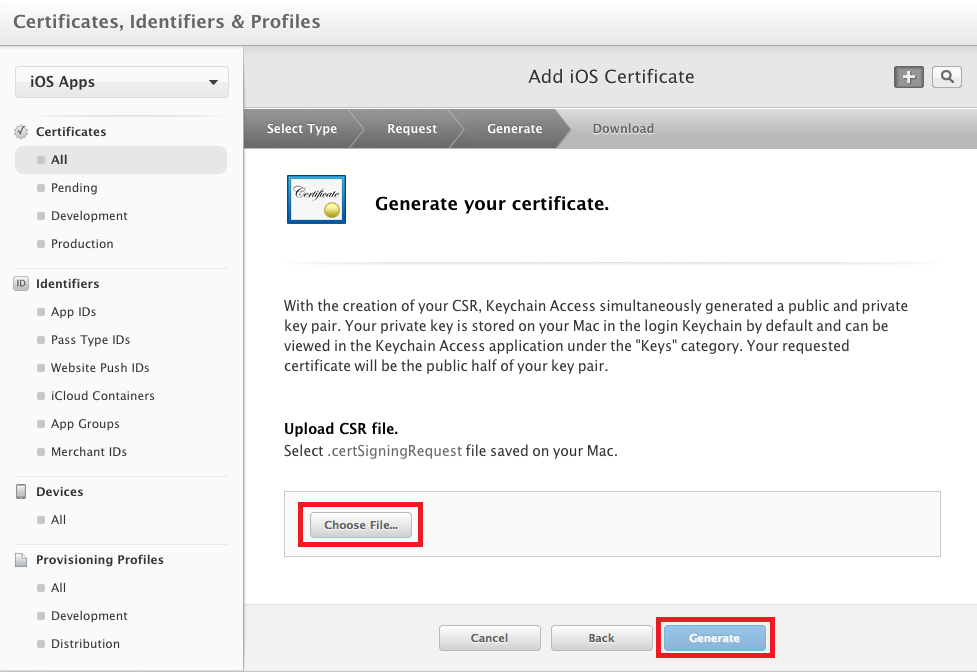
- Once you have the certificate on your hard drive, go back to the browser and Upload the CSR file using the Choose File... option. Then press Generate to obtain it.
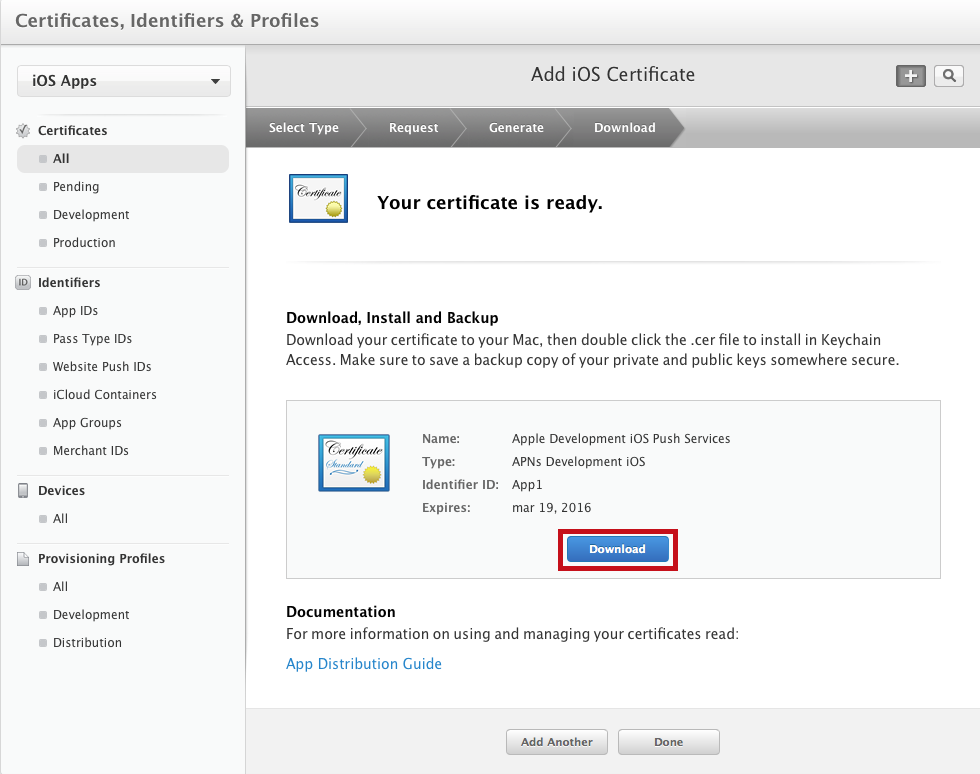
- The certificate is now ready to be downloaded. Just press the Download button and then press Done to complete the procedure.
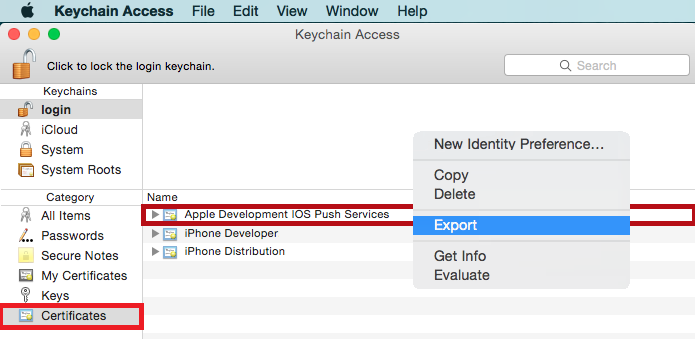
- Once the download has completed, double-click on the *.cer file to install it in Keychain Access. You will now find it in Keychain Access in the list of available Certificates.

- Right-click on the brand-new certificate and choose the option Export.
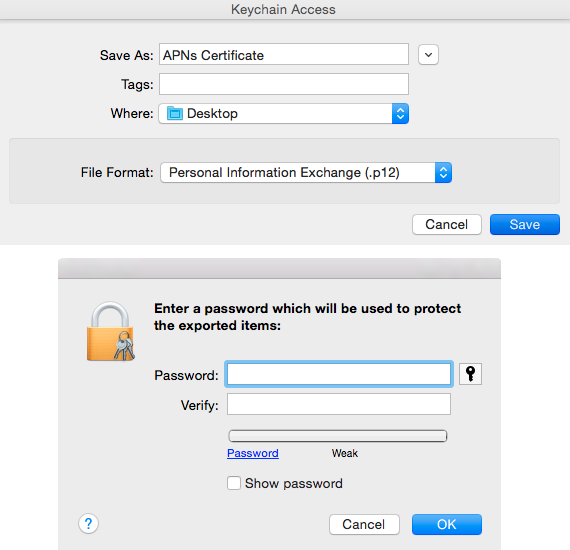
- A new dialog opens asking for the location of the exported file. Set a Save As name for it and choose the location using the Where field. Be careful to choose, as File Format, Personal Information Exchange (.p12). Then press Save. As soon as you press Save another dialog asks for a protection password. Type the desired password in the Password field and verify it just below in the Verify field. Then press OK to confirm.
Result
Now that you have both an App ID and the related APNs Certificate, you can see from the App ID details that the Push Notification service went from the Configurable status to the Enabled status for the development environment.
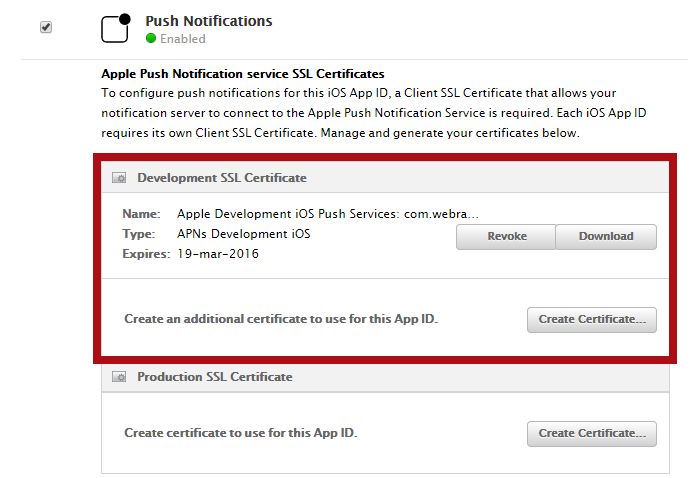
By pressing the Edit button you have the details for each of the services and in the Push Notifications section you can also download the certificate.
When necessary, repeat the procedure for the production environment and set up both the App ID and the APNs certificate.